


There is a point every October when the fruit situation gets out of hand. You picked too many at the orchard, somebody brought a bag from a coworker’s tree, and now eight apples are sitting on the counter about a week away from going soft. Pie means dough, a rolling pin and a free afternoon. What you actually want is the old-fashioned apple crisp: thick-cut apples tossed with brown sugar and cinnamon, buried under a heavy layer of oat streusel, baked at 350 degrees for 45 to 55 minutes until the edges bubble and caramelize.
The version worth committing to memory uses four Granny Smith apples and four Fuji, one stick of butter cut into the topping while it is still cold, and a 13×9 baking dish you do not even have to grease, because the apples throw off plenty of moisture on their own. Twelve servings. Twenty minutes of actual work. No pastry skills required.
Use Two Kinds Of Apples, Not One
Granny Smith is the backbone. It is tart, acidic and firm enough that it comes out of the oven as fruit rather than sauce. Fuji does the other job: sweet, crunchy, and sweeter still once baked. Together they give you a filling that tastes like something instead of just tasting like sugar.
If you are substituting, run the varieties in order from sour to sweet: Granny Smith, Pink Lady, Braeburn, Honeycrisp, Golden Delicious, Gala, Fuji. Honeycrisp releases a lot of juice as it bakes, which helps build syrup, but it is so sweet that you may want to pull back on the sugar. The two to leave at the store are Red Delicious, which goes mealy, and McIntosh, which collapses. A single-variety crisp works only if the apple already has sweet-tart balance built in, like Gravenstein or Jonagold.
Cut Them Thick And Cut Them Even
Peel the apple, cut it in half, core it, cut it in half again, then slice about half an inch thick. Thin slices are the single most common reason a crisp turns to applesauce under the topping. Half an inch holds up through almost an hour in the oven and still goes tender.
Some bakers prefer one-inch chunks instead of slices, on the theory that chunks sit better on a spoon and slices vary too much in thickness, which leaves you with some mushy bites and some crunchy ones. Either shape works. What matters is that the pieces match each other. Peeling is also optional, though the skins add chew and a more rustic texture.
The Topping Goes In The Freezer Before It Goes In The Oven
This is the step that separates a crisp from a damp lid of oats. Combine the flour, brown sugar, oats, cinnamon and salt, then cut in the cold butter with a pastry blender until the butter pieces are about the size of couscous. Fold in the chopped walnuts. Then put the whole bowl in the freezer while you deal with the apples.
Cold butter melts slowly in the oven, which gives you a browned, crunchy top over soft fruit instead of a greasy sheet. Butter that has gone soft while you work melts straight into the oats and bakes flat. If the mixture starts looking oily, chill it and come back to it. Stop mixing the moment you have coarse crumbs, because overworking it turns the whole thing to paste. When you sprinkle it on, scatter it loosely and do not pack it down. Packed streusel bakes into a dense crust.
Oats Are The Whole Reason It Is Called A Crisp
Apple crisp and apple crumble are close to the same dessert. The difference is the topping: a crumble is usually just flour, sugar and butter, while a crisp carries oats, and often nuts as well. That is where the texture comes from.
Use old-fashioned rolled oats. They are hardier in baking, and they give you variety across the pan, with some oats crisping and some staying soft and chewy. Quick-cooking oats soften more and bake into a finer, flatter top. Steel-cut oats do not belong anywhere near this dish; they stay hard and gritty in the time it takes the apples to cook. If you want the oats to stay whole, try a variation: stir them in after you have cut in the butter, so they do not get broken down while you work the fat into the flour.
Three Tablespoons Of Flour Keep The Filling From Flooding
Apples are mostly water, and eight of them in a 13×9 release a lot of it. Tossing the slices with three tablespoons of all-purpose flour along with the brown sugar, cinnamon and nutmeg means that liquid turns into a thick, glossy sauce instead of a puddle at the bottom of the pan.
If your crisp still runs loose, add a little cornstarch to the apples next time. There is a more involved route, which is cooking the apples in browned butter and sugar on the stove first, thickening them with a cornstarch slurry, then spreading them in the dish. It is an extra pan to wash and it produces a caramel-like syrup, but the flour method gets you most of the way there with no skillet at all.
Bake At 350 And Leave The Foil In The Drawer
Forty-five to fifty-five minutes at 350 degrees on the lower middle rack. The lower position helps the bottom cook while the top browns. Do not cover it. Foil traps steam, and steam is what you spent all that effort on the cold butter to avoid.
Three things tell you it is done at once: the topping is golden, the edges have caramelized, and the juices are bubbling around the sides. Color alone is not enough. Push a fork or a paring knife into the middle and the apples should give easily while still holding their shape. If the top is browning faster than the fruit is cooking, tent it loosely for the last stretch, then pull the foil for the final few minutes.
Let It Sit, Then Load It Up
Give it 15 to 20 minutes on the counter before you serve. The juices thicken as it cools, and cutting into it straight out of the oven is how you end up spooning soup onto a plate. It should still be warm, because the contrast between the hot fruit and cold ice cream is the entire point.
Vanilla ice cream and a drizzle of caramel sauce is the classic finish and it is hard to beat. Whipped cream or a spoonful of crème fraîche adds a lighter contrast. Maple syrup works. So does a slice of sharp cheddar on the side, which sounds strange until you try it. Leftovers warmed with a splash of heavy cream make a perfectly respectable breakfast.
Making It Ahead Without Wrecking The Texture
The streusel can be made two to three days in advance and kept in an airtight container in the fridge, which turns this into a 10-minute job on the day. Slice the apples the same day you bake, since they brown fast. If you must prep them early, soaking the slices in pineapple juice keeps them from turning in the fridge; a solution of 8 cups cold water and 4 teaspoons salt for five minutes does the same thing.
Already baked and serving later? Cover it with foil and hold it in the oven at 200 degrees for up to an hour. For storing leftovers, let it cool completely first, two to three hours on a wire rack, or the trapped heat steams the topping soft. Refrigerated and covered, it keeps several days. Reheat it in a 350-degree oven, 12 to 15 minutes for a few portions or 20 to 30 for a full pan, or a toaster oven at 350 for 15 to 30 minutes for one portion. The microwave takes 30 to 60 seconds and gives you a soggy top, which is fine when nobody is watching. It freezes well for up to three months; thaw in the fridge for a day before reheating.
Why This Dessert Outlasted Everything Else
Apple crisp was in American cookbooks by the 1920s, including Isabel Ely Lord’s Everybody’s Cook Book in 1924. It took off during World War II, when sugar and butter were rationed and a simple crisp made more sense than a full apple pie. Nothing about that math has changed. One bowl, one baking dish, one stick of butter, and a dessert that feeds twelve people.
Three tablespoons of dark rum in the apples is optional, and I would not skip it. Brandy or calvados works the same way. A good share of the alcohol bakes off, though not all of it, and what stays behind is a deeper, warmer flavor under the cinnamon. If you are feeding kids, leave it out and nobody will file a complaint.
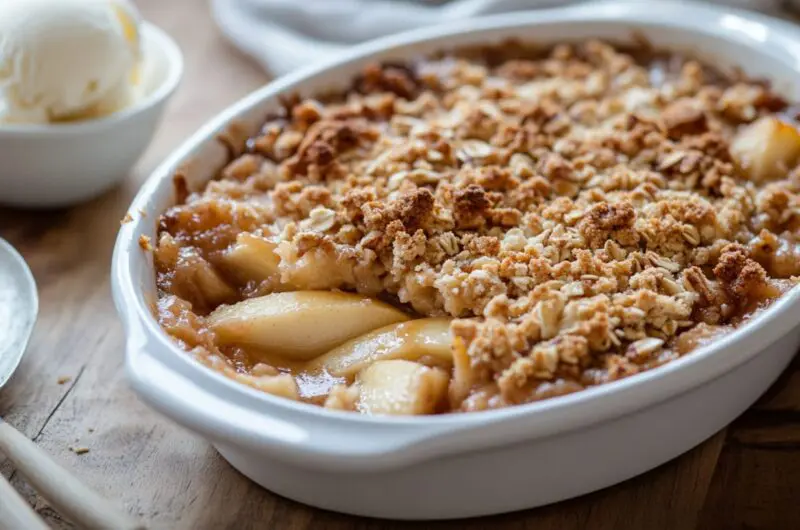
Old-Fashioned Apple Crisp with Brown Sugar Oat Streusel
Course: DessertCuisine: American12
servings20
minutes55
minutesThick-cut apples under a heavy oat streusel that actually stays crunchy.
Ingredients
1 cup all-purpose flour (for the topping)
1 cup packed light brown sugar (for the topping)
1 cup old-fashioned rolled oats
1 1/2 teaspoons ground cinnamon (for the topping)
1/2 teaspoon sea salt
1 stick cold unsalted butter
1/2 cup walnuts, finely chopped
4 Granny Smith apples
4 Fuji apples
3 tablespoons all-purpose flour (for the filling)
1/2 cup packed light brown sugar (for the filling)
1 1/2 teaspoons ground cinnamon (for the filling)
1/4 teaspoon freshly ground nutmeg
3 tablespoons dark rum (optional)
Directions
- Preheat the oven to 350 degrees and set a rack in the lower middle position. Have a deep 12×8 or standard 13×9 baking dish ready. There is no need to grease it, since the apples release plenty of moisture as they bake.
- In a large bowl, combine 1 cup flour, 1 cup brown sugar, the oats, 1 1/2 teaspoons cinnamon and the salt. Stir until everything looks evenly mixed with no pockets of dry flour.
- Add the cold butter and cut it in with a pastry blender until the butter pieces are about the size of couscous and the mixture looks crumbly. Stop as soon as you have coarse crumbs, because overworking it turns the topping to paste.
- Fold in the finely chopped walnuts with a rubber spatula until they are evenly distributed. Put the bowl in the freezer and leave it there while you prepare the apples. Cold butter is what gives you a crunchy top instead of a greasy one.
- Peel the apples, cut each one in half, remove the cores, then cut each half in half again. Slice the quarters about 1/2 inch thick, keeping the pieces as uniform as you can so they cook at the same rate.
- Put the sliced apples in a large bowl with 3 tablespoons flour, 1/2 cup brown sugar, 1 1/2 teaspoons cinnamon, the nutmeg and the rum if you are using it. Toss until every slice is coated and no dry flour remains in the bottom of the bowl.
- Transfer the apples and any juices to the baking dish and spread them into an even layer. Take the streusel out of the freezer and scatter it loosely over the whole surface, then pat it gently to even it out. Do not pack it down.
- Bake uncovered for 45 to 55 minutes, until the topping is golden, the edges have caramelized and the juices bubble around the sides. Test the apples with a fork; they should be tender but still holding their shape. Rest 15 to 20 minutes before serving warm with vanilla ice cream and caramel sauce.
Notes
- The streusel can be made 2 to 3 days ahead and kept in an airtight container in the refrigerator, which cuts day-of prep to about 10 minutes.
- Use old-fashioned rolled oats, not quick-cooking or steel-cut. Rolled oats hold their texture through a long bake and give you both crisp and chewy bites.
- To serve later the same day, cover the baked crisp with foil and hold it in the oven at 200 degrees. Reheat refrigerated leftovers at 350 degrees for 12 to 15 minutes.
Frequently Asked Questions
Q: Which apples should I buy if my store is out of Fuji?
A: Keep Granny Smith as the base and swap in any firm, sweeter variety: Pink Lady, Braeburn, Honeycrisp, Gala, Jonagold or Golden Delicious. Honeycrisp is very sweet and juicy, so ease up on the sugar if you use it. Skip Red Delicious, which turns mealy, and McIntosh, which breaks down.
Q: Do I have to peel the apples?
A: No. The crisp works fine with the skins left on; you just get a chewier, more rustic texture in the filling. Peeling gives you a softer, more uniform bite, which is why the recipe calls for it.
Q: Why did my filling come out watery?
A: Either the apples were not tossed with flour, or the crisp was cut into too soon. The flour thickens the juices into a sauce as it bakes, and the filling keeps setting as it cools, so give it 15 to 20 minutes out of the oven. A little cornstarch in the apples helps too.
Q: Can I freeze apple crisp?
A: Yes. Let it cool completely, cover it well and freeze for up to three months. Thaw it in the refrigerator for a day, then reheat in a 350-degree oven for 12 to 15 minutes until hot and the topping has crisped back up.