


A pound of 80/20 hits a hot skillet and almost every cook in America reaches for the spoon in the same half second. Chop, stir, chop, stir, until the pan holds something that looks like wet gravel sitting in a puddle. Dinner comes out fine. Just fine. A little flat, a little watery, the sort of taco night nobody mentions again. That half second is the whole problem. Never start breaking up and stirring ground beef the moment it lands in the pan. Put the spoon down and let the meat sit there.
Cooked Through And Browned Are Two Different Things
Gray beef is beef that got cooked but never got browned. The deep, savory, almost nutty taste in good chili comes from the Maillard reaction, and that reaction only gets going in earnest above about 300 degrees. Ground beef releases a lot of water as it cooks. Steam tops out at 212 degrees. While that water is pooling around the meat, your pan is stuck nearly 100 degrees short of browning, and the beef is simmering in its own juice.
Stirring hurts twice. Nothing stays pressed against the hot metal long enough to build a crust, and every pass of the spoon opens up more surface and pushes out more moisture. Jostling the meat around in those first minutes is how you cook away the exact thing you were trying to create.
Buy 80/20 And Leave The 73/27 In The Case
Fat carries flavor and conducts heat, so 80/20 or 85/15 ground chuck is the sweet spot for almost everything. It renders enough to drain if the recipe asks for it, and it is usually the best value at the meat counter anyway. The 90/10 ground sirloin browns beautifully but gives you less room for error, so run the heat a touch higher and add a tablespoon of oil. The 73/27 is a trap. The pan floods with grease almost immediately and the meat boils, which is why a little fat helps and a lot of it ruins the whole thing.
Use A 10-Inch Skillet, And Not The Nonstick One
One pound of beef fits a 10-inch skillet with room to spare. Two pounds crammed into that same pan turns into a stewing operation, so use two skillets or cook in two batches. The extra five minutes buys you crispy edges instead of a gray pile.
Cast iron is the best tool for the job because it gets hot and stays hot. Heavy stainless steel is a close second and leaves behind the browned bits on the bottom of the pan that turn into a sauce base once you splash in broth, wine, or canned tomatoes. Nonstick will cook your beef through, but it will never give you the same crust, and the coating is not built for the heat searing needs.
Preheat Longer Than Feels Necessary
Cold meat in a cold pan drops the temperature twice, and by the time the skillet climbs back up, the beef is already swimming. Set the pan over medium-high and leave it alone for 2 to 3 minutes before anything touches it. Flick a few drops of water in. They should evaporate within a second or two. If they bead up and lounge around, you are not ready.
Your ears are the other gauge. Active, loud sizzling is the sound of water leaving the surface. A soft hiss with visible steam means the heat is too low and you are steaming dinner.
Drop It In Big Chunks, Then Walk Away
Tear the beef into several large hunks, about the size of oversized meatballs, and drop them into the hot pan. Press each one flat with the back of a spatula so as much meat as possible touches metal. Jennifer Borchardt, the culinary director of Pre Brands, puts it plainly: “Spreading out your beef into a thin layer on the bottom of the pan will increase the amount of surface area that’s directly contacting the hot pan,” she says, and the payoff is faster browning plus crispy bits around the edges.
Now the hard part. Do not touch it for 2 to 4 minutes. Set a timer if your hands get restless. Lift the edge of one chunk with a spatula and look for deep brown, not tan. Flip the pieces, give the second side another 2 to 3 minutes, and only then break everything down with a wooden spoon or a potato masher. Stir just enough to expose the pink spots and cook 2 to 3 minutes more.
Dry Surface, Nothing Else In The Pan
Blot the raw beef with paper towels before it goes anywhere near heat. Grocery store ground beef sits in its own weeping liquid in that foam tray, and every drop you remove is a drop the pan does not have to boil off. The whole chain runs one direction: moisture allows steaming, steaming blocks the browning, and no browning means no flavor.
If the pan floods anyway, you have not lost dinner. Dump everything into a colander, let it drain, then return the meat to the hot skillet and keep going.
Salt Goes In At The End, Every Single Time
Salt pulls water out of meat through osmosis. Salt the beef on the counter and it will be sitting in a puddle before it ever hits the skillet. Salt it in the pan too early and that water shows up right when you need the surface dry. Wait until the meat is browned and drained, then season it with everything you want.
Dried herbs and spices have a second problem. Add them early and a good share of them pour off with the grease, leaving the beef underseasoned after you did the work. Onions and garlic release their own water and scorch at searing heat, so brown the beef first and add aromatics after, or cook them separately and combine.
The Baking Soda Trick Worth Trying
Dissolve about a quarter teaspoon of baking soda in 1 tablespoon of water per pound of ground beef, work it through the meat with your hands, and let it rest at room temperature for 15 to 20 minutes. The baking soda raises the pH at the surface so the proteins do not bind as fast and squeeze out their moisture. The meat stays juicier and browns quicker.
It matters most with lean beef, which dries out in a hurry. At that small an amount you will not taste the baking soda at all, just a more tender crumble and a better sear.
Drain It, But Not All The Way
Tilt the skillet and spoon the rendered fat into a heatproof jar, leaving a tablespoon or two stirred back through the meat so it does not turn dry in the casserole. For very fatty beef, dump the whole pan into a colander set over a bowl. Beef fat never goes down the drain. It hardens as it cools and will clog your pipes. Let it set up and scrape it into the trash, or keep the jar in the fridge for frying potatoes and eggs.
Browned beef made on Sunday keeps in a sealed container in the refrigerator for 3 to 4 days. Pressed flat in a freezer bag with the air squeezed out, it holds for about 3 months, which makes weeknight tacos a 10-minute job.
Know When It Is Actually Done
The finish line for ground beef is 160 degrees Fahrenheit internal, and a thermometer tells you that faster than squinting at the pan does. This matters most for casseroles and sauces, where the beef gets browned first and then buried in liquid that may never bring it back up to temperature.
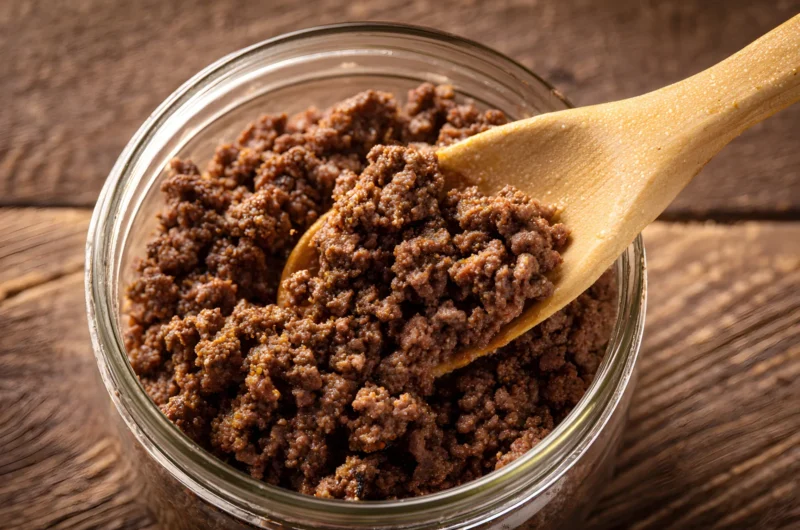
Perfectly Browned Ground Beef
Course: DinnerCuisine: American4
servings20
minutes12
minutes300
kcalThe skillet method that turns a plain pound of ground chuck into deep brown, crispy-edged crumbles.
Ingredients
1 pound 80/20 ground chuck
1/4 teaspoon baking soda
1 tablespoon water
1 tablespoon vegetable oil (only if using 90/10 beef)
3/4 teaspoon kosher salt
1/2 teaspoon black pepper
1/2 teaspoon onion powder
1/2 teaspoon garlic powder
1/4 teaspoon ground cumin (optional)
Directions
- Stir the baking soda into the tablespoon of water until it dissolves, then work the mixture through the ground beef with your hands. Let the meat rest at room temperature for 15 to 20 minutes. This keeps the proteins from binding too fast and squeezing out moisture, so the beef browns quicker and stays tender.
- Blot the surface of the beef with paper towels to pull off any standing liquid. Every drop you remove now is a drop the skillet does not have to boil away later. Do not season the meat at this stage.
- Set a 10-inch cast iron or heavy stainless steel skillet over medium-high heat and let it sit empty for 2 to 3 minutes. Flick in a few drops of water to test it. They should evaporate within a second or two, not bead up and sit. Add the oil only if you are working with 90/10 beef.
- Tear the beef into several large chunks, roughly the size of oversized meatballs, and drop them into the hot pan in a single layer. Press each one down with the back of a spatula so as much meat as possible is touching the metal. You should hear loud, active sizzling right away.
- Leave the beef completely alone for 2 to 4 minutes. Do not stir it, do not break it up, do not peek underneath more than once. Moving the meat resets the browning process and pushes out moisture that will steam the pan.
- Lift the edge of one chunk with the spatula and check the underside. You want a deep brown crust, not pale tan. Flip each piece and brown the second side for another 2 to 3 minutes.
- Now break the beef apart with a wooden spoon or a potato masher, working it into smaller crumbles. Stir just enough to turn any still-pink pieces toward the heat and cook 2 to 3 minutes more, until no pink remains and a thermometer reads 160 degrees Fahrenheit.
- Tilt the pan and spoon off most of the rendered fat into a heatproof jar, keeping a tablespoon or two in with the meat. Never pour it down the drain. Add the salt, pepper, onion powder, garlic powder, and cumin now, stirring for about 30 seconds so the seasoning coats every crumble.
Notes
- Cooking 2 pounds? Use two skillets or two batches. One pound per 10-inch pan is the limit before the meat starts to steam.
- Onions and garlic go in after the beef is browned, not before. They release water and scorch at the heat browning needs.
- Cooled browned beef keeps in a sealed container in the refrigerator for 3 to 4 days, or in a flattened freezer bag for about 3 months.
Frequently Asked Questions
Q: Why does my ground beef always turn gray and watery?
A: Either the pan was not hot enough or there was too much meat in it. Both let liquid build up faster than it can evaporate, and the beef simmers in its own juice instead of searing. Steam maxes out at 212 degrees, while browning needs more than 300.
Q: Do I really need cast iron, or will my nonstick pan work?
A: Nonstick will cook the beef through, but it will not build the same crust and it is not meant for the high heat searing requires. Cast iron or heavy stainless steel holds heat better and leaves browned bits in the pan you can deglaze into a sauce.
Q: Can I brown ground beef in a slow cooker to save a step?
A: No. A slow cooker never gets hot enough to trigger browning even on high, and the tall sides trap moisture, so the meat steams. Brown it in a skillet first, then add it to the crock.
Q: What if too much liquid shows up in the pan anyway?
A: Pour the whole thing into a colander set over a bowl, let it drain, then return the beef to the hot skillet and keep cooking. Once the water is gone, the surface can finally brown.