


You did everything right. You skipped the thin steaks on sale and bought the thick one, let it sit on the counter, got the cast iron hot enough to make the smoke alarm nervous, spooned butter and garlic over the top like a show-off. Then you set it on the board, grabbed a knife, and watched half the reason you bought a ribeye run out onto the wood in a pink puddle.
That puddle is the mistake. Cutting into a steak the second it leaves the heat is the single most common way home cooks wreck a piece of beef that was already cooked correctly, and it takes about four seconds to do.
Butchers hear the complaint constantly. Customers buy a good steak, take it home, and come back saying it was tough, dry, or just not as good as the steakhouse. Most of the time the meat was never the issue.
Why Your Cutting Board Ends Up Soaked
Heat makes muscle fibers contract. As they tighten, they push moisture toward the center of the steak, which is why a steak straight off the fire is essentially holding its juice under pressure. Slice it open right then and that liquid has one place to go, and it is not back into the meat.
Give it a few minutes and the fibers relax and reabsorb what they squeezed out. The difference is not a rounding error. A steak cut immediately can lose up to 5 to 10 times more juice than one that sat quietly on a board first. Everything you taste as “juicy” is that liquid staying put.
There is a second thing happening while it sits. After cooking, the surface of a piece of meat can be 50 degrees or more hotter than the middle. Resting lets that heat move inward, which evens out the doneness and is the reason a rested steak looks pink edge to edge instead of showing a thick gray ring.
Five Minutes, Eight Minutes, Fifteen Minutes
Thin steaks need about 5 minutes. Thick cuts want 8 to 10 minutes, and a heavy bone-in porterhouse can take up to 15. That is it. You are not aging the thing, you are giving it a short nap.
Skip the tight foil wrap. A single steak does not need a tent at all, and a small cut sealed under foil for ten minutes will keep cooking and dry out. Set it on a warm plate or cutting board and walk away. It will not go cold on you; there is more residual heat in a seared steak than people expect.
Use the time. Toss the salad, finish the potatoes, pour the drinks. The rest is only hard when you stand over the steak staring at it with a knife in your hand.
Pull It Off the Heat Before It Is Done
Resting only works in your favor if you planned for it. The steak keeps cooking after it leaves the pan, so the temperature you pull at should be lower than the temperature you want to eat. Pull at 125°F for medium-rare and it will climb to 130°F to 135°F while it sits.
For finished doneness, aim for 135 degrees for medium-rare, 140 for medium and 145 for medium-well, then subtract a few degrees for carryover when you decide to pull it.
Cooking by the clock is a coin flip. Four minutes a side assumes your steak, your pan and your burner match whoever wrote that down, and they do not. Buy an instant-read thermometer. The ThermoWorks Thermapen is the gold standard at $70 to $100, but a $15 instant-read will fix more of your cooking than any pan upgrade. Poking a steak with a fork to check it is the worst option of all, since you are opening holes for the juice to escape through.
Resting Will Not Save a Steak That Started Cold and Wet
Take the steak out of the fridge 30 to 45 minutes before it hits the heat, longer for a really thick cut. It will not reach room temperature in that window and it does not need to. Going from 38°F to 50°F is enough to change how evenly it cooks, because a cold center forces the outside to sit in the heat longer and that is where the gray band comes from.
Pat it bone dry with paper towels. Surface water has to boil off before browning can start, so a wet steak steams itself gray before it ever browns. Dry surface, loud sizzle, real crust.
Then get the pan hotter than feels polite. Cast iron over medium-high for 3 to 5 minutes, until a drop of water vanishes almost on contact and you see wisps of smoke. On a grill, close the lid and preheat at least 10 to 15 minutes before anything goes on the grates. Give each steak at least an inch of clearance and cook in batches if you have to, because a crowded pan drops in temperature and traps steam.
Salt It Way Earlier Than You Think
A sprinkle of salt as the steak hits the pan seasons the outside and nothing else. Salt applied 40 to 60 minutes ahead has time to dissolve, get pulled in, and season the meat itself. Leave it uncovered on a rack in the fridge for 12 to 24 hours and you get the best version: deeper seasoning plus a dried-out surface that browns hard.
Use kosher salt and more of it than feels right if you grew up shaking table salt out of a round box. Hit the sides and the fat cap too, since that fat crisps up and most people never season it. Plenty of the salt ends up on the pan anyway.
Black pepper goes on just before cooking, not with the salt. Applied too early it can work against the browning you are chasing. Skip the pre-mixed steak rubs while you are at it; if you bought good beef, a wall of garlic powder and paprika is covering up what you paid for.
Buy the Thick One
Thickness matters more than size. Somewhere between 1 and 1.5 inches gives you enough room to build a crust without blowing past medium-rare in the middle. A thin steak will burn outside and stay raw inside no matter how carefully you work, and it does not hold enough juice to reward a rest.
Marbling is the other thing to look at. Those white flecks and lines are where the flavor and the tenderness live, and a lean cut on steak night is a sad, chewy decision. Match the cut to the method too: a T-bone does its best work on the grill, while a boneless ribeye is made for a skillet because of the fat running through it.
If there is a real butcher counter near you, use it. They will steer you toward cuts the grocery case never labels well, and they will cut it to the thickness you ask for, which the shrink-wrapped stack never will.
Then Slice It the Right Direction
After the rest, look at the meat and find the direction the muscle fibers run, then cut straight across them. Slicing with the grain leaves long intact strands that your teeth have to do all the work on, which is how a properly cooked steak still eats tough.
It matters most on flank, skirt, hanger and brisket, where the grain is easy to see. Slice those as thin as you can manage. Done right, a $10 per pound flank steak can eat like a $25 per pound cut, which is the best return on five seconds of attention in all of cooking.
Cast Iron Ribeye, Rested Like It Should Be
One note on fat before you cook. Extra virgin olive oil has a smoke point around 320 degrees and butter is only about 350, while a searing steak can be working at up to 500 degrees. Sear in something that can take it, like canola, avocado or peanut oil, then add butter at the end with garlic and thyme so it flavors the steak instead of burning in the pan.
Flip more than you were told to. The old rule was one flip for pretty grill marks, but turning the steak every 30 to 60 seconds after the first crust sets cooks it faster and more evenly, up to about 30 percent faster than the single-flip method. Wait for the steak to release from the pan on its own before that first turn, and use tongs, never a fork.
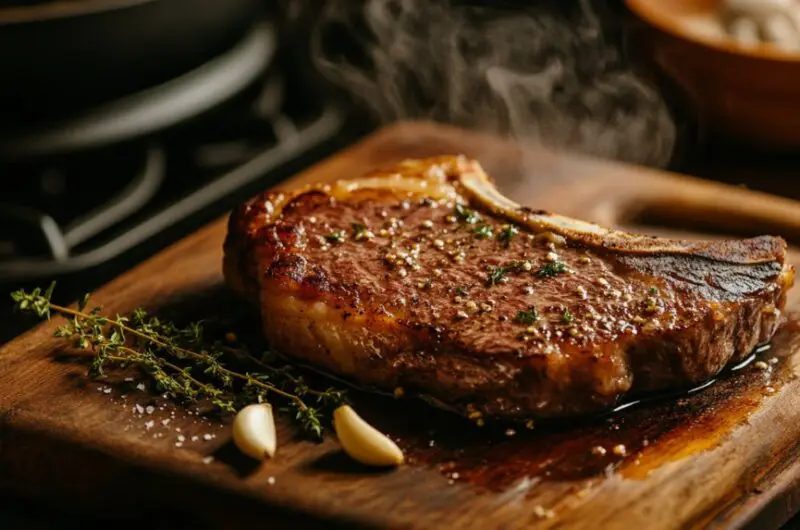
Cast Iron Butter-Basted Ribeye With a Proper Rest
Course: MainCuisine: American2
servings45
minutes15
minutes680
kcalThe steakhouse ribeye you keep ruining in the last ten seconds, fixed.
Ingredients
2 boneless ribeye steaks, 1 to 1 1/2 inches thick (about 12 oz each)
2 teaspoons kosher salt
1 teaspoon coarsely ground black pepper
1 tablespoon avocado oil or canola oil
3 tablespoons unsalted butter
4 garlic cloves, smashed, skins on
4 sprigs fresh thyme
1 sprig fresh rosemary (optional)
Flaky sea salt, for finishing
Directions
- Take the steaks out of the fridge 45 minutes before you plan to cook. Pat them completely dry with paper towels on both faces and all the way around the edges, including the fat cap. Season every surface generously with the kosher salt, then set them on a rack over a plate and leave them uncovered on the counter.
- About five minutes before cooking, press the black pepper onto both sides. Keeping the pepper separate from the salt step matters, since pepper applied too early can work against the browning you want. Set a warm plate or cutting board near the stove now so it is ready later.
- Heat a 12-inch cast iron skillet over medium-high for 3 to 5 minutes. It is ready when a drop of water flicked onto the surface evaporates almost instantly. Add the oil, swirl to coat, and wait until it shimmers and you see the first wisps of smoke.
- Lay the steaks in the pan away from you, leaving at least an inch of space between them. If your skillet is smaller than 12 inches, cook one steak at a time rather than crowding the pan and dropping its temperature. You should hear a loud, steady sizzle the moment the meat lands.
- Leave the steaks alone for the first 2 to 3 minutes. The meat will stick at first and then release on its own once a crust forms, and that release is your signal to turn it. Use tongs, never a fork.
- After that first flip, turn the steaks every 30 to 60 seconds. The frequent flipping cooks them faster and more evenly without costing you any crust. Stand them on their fat edge with the tongs for about 30 seconds along the way so the fat cap crisps.
- In the last minute, drop in the butter, smashed garlic, thyme and rosemary. Tilt the pan toward you and spoon the foaming butter over the steaks continuously. Check the center with an instant-read thermometer and pull at 125°F for medium-rare, or a few degrees shy of 140°F if you want medium.
- Move the steaks to the warm plate or board and walk away for 8 minutes. Leave them uncovered or tent them very loosely, since tight foil will keep cooking them. Slice against the grain, scatter flaky salt over the cut surfaces, and spoon any board juices back over the slices.
Notes
- For the best crust, salt the steaks the night before, leave them uncovered on a rack in the fridge for 12 to 24 hours, then cook as written. The surface will look dry and almost crystalline, which is exactly what you want.
- The same method works on flank or skirt steak, but those cuts need to be sliced very thin and strictly against the grain. Rest them 5 minutes instead of 8.
- If the sizzle suddenly quiets down, the pan temperature has dropped. Lift the steaks out for a moment, let the skillet come back up to heat, and start again.
Frequently Asked Questions
Q: How long does a steak really need to rest?
A: About 5 minutes for a thinner steak and 8 to 10 minutes for a thick cut. A big bone-in piece like a porterhouse can go up to 15. Past that you are just letting dinner cool for no extra benefit.
Q: Won’t my steak be cold by the time I eat it?
A: No. There is plenty of residual heat in a seared steak, and a warm plate or board keeps it going. Avoid wrapping a single steak tightly in foil, because that traps heat and keeps cooking it past where you pulled it.
Q: Do I actually need a meat thermometer?
A: It will do more for your steaks than any other purchase. The ThermoWorks Thermapen runs $70 to $100, but a $15 instant-read gets the job done. Cooking by minutes per side ignores thickness, pan heat and starting temperature.
Q: Can I sear in olive oil or butter?
A: Not for the sear itself. Extra virgin olive oil smokes around 320 degrees and butter around 350, while a steak sear can hit up to 500. Use canola, avocado, peanut or extra light olive oil for the sear and add butter in the final minute.