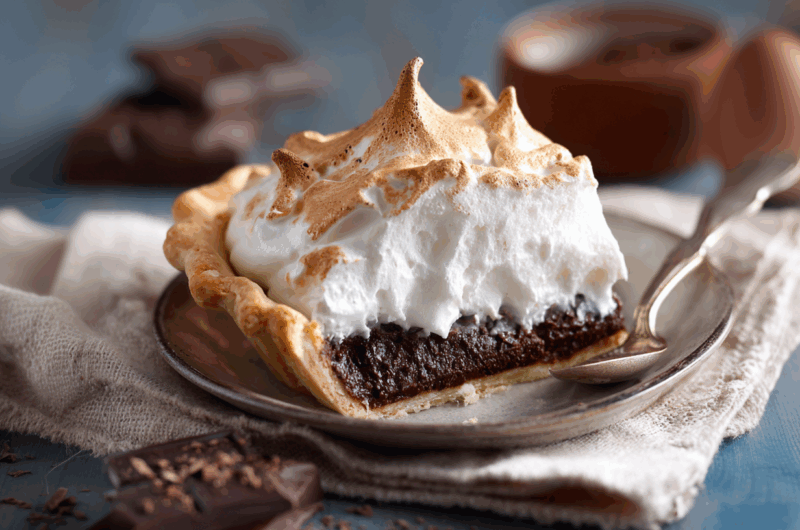
Most people think chocolate cream pie when they want something rich and decadent, but there’s an old Southern dessert that makes regular chocolate pie look boring. Chocolate meringue pie was once the star of Sunday dinners across the South, with its gooey chocolate filling topped by a cloud of sweet meringue that’s torched to golden perfection. Unlike its cream-topped cousin, this forgotten gem combines the richness of chocolate custard with the light, airy sweetness of meringue for a dessert that’s both indulgent and surprisingly refreshing.
Why chocolate meringue pie disappeared from most tables
Walk into any diner today and you’ll find lemon meringue pie on the menu, but chocolate meringue pie has mysteriously vanished. This dessert was once a Sunday staple in Southern households, where grandmothers would whip up towering meringues that looked like sweet clouds floating on rich chocolate seas. The decline happened gradually as convenience foods took over kitchens and people started reaching for store-bought chocolate cream pies instead of making meringue from scratch.
The timing couldn’t have been worse for this vintage dessert. As home baking became less common in the 1970s and 80s, recipes that required multiple steps like blind baking crusts and whipping meringues fell by the wayside. People wanted quick fixes, and chocolate meringue pie demands patience and technique that many modern bakers simply don’t want to invest. The result is a generation that’s never experienced the magic of cutting into a perfect slice where the meringue stays fluffy and the chocolate filling oozes just enough to coat the fork.
The secret to getting that perfect chocolate filling
The chocolate filling in this pie isn’t just melted chocolate mixed with cream like you’d find in modern recipes. Traditional chocolate meringue pie uses both cocoa powder and actual chocolate, creating layers of chocolate intensity that hit different parts of your palate. The cocoa powder provides that deep, slightly bitter chocolate base, while the melted chocolate adds richness and helps create that perfect custard texture that’s thick enough to slice cleanly but soft enough to melt on your tongue.
The trick lies in tempering the egg yolks properly so they don’t scramble when you add them to the hot chocolate mixture. Most home bakers rush this step and end up with lumpy, broken custard that looks more like chocolate scrambled eggs than pie filling. Classic recipes call for whisking a small amount of the hot mixture into the egg yolks first, then gradually adding more until the yolks are warmed up enough to handle the full heat. This creates a silky smooth filling that sets beautifully and cuts like a dream.
Making meringue that won’t weep or collapse
Nothing’s more disappointing than a beautiful meringue that turns into a soggy mess an hour after you make it. The key to stable meringue starts with completely clean bowls and beaters – even a tiny bit of grease will prevent the egg whites from whipping properly. Room temperature egg whites whip better than cold ones, but here’s the real secret: cream of tartar. This acidic powder helps stabilize the protein structure in egg whites, making your meringue less likely to collapse or weep.
The sugar needs to be added gradually while the whites are whipping, not all at once. Start with just a tablespoon when the whites begin to foam, then add the rest slowly while the mixer runs. Traditional methods involve whipping until the meringue forms stiff peaks that hold their shape when you lift the beaters. The final meringue should be glossy and smooth, with no grittiness from undissolved sugar. When you spread it over the chocolate filling, make sure it touches the crust edges to seal in the filling and prevent shrinkage.
Blind baking the crust without soggy bottoms
A soggy pie crust ruins everything, especially with a moist filling like chocolate custard. Blind baking means pre-baking the empty crust before adding any filling, and it’s absolutely essential for custard pies. The process involves lining the unbaked crust with parchment paper or foil, then filling it with pie weights, dried beans, or uncooked rice to prevent the bottom from puffing up and the sides from shrinking down during baking.
Most people make the mistake of under-baking their blind-baked crusts, leaving them pale and prone to getting soggy once the filling goes in. The crust should be golden brown on the edges and set on the bottom before you remove the weights and parchment. Some bakers brush the hot crust with beaten egg white as soon as it comes out of the oven, creating a barrier that helps prevent moisture from seeping through. This extra step takes two minutes but makes the difference between a crispy crust and a disappointing soggy mess.
Why cornstarch makes all the difference
Modern chocolate pie recipes often use flour as a thickener, but traditional chocolate meringue pie relies on cornstarch for its signature smooth, glossy texture. Cornstarch creates a cleaner, more transparent thickening than flour, which can make chocolate fillings look muddy or dull. The cornstarch needs to be whisked into the sugar first, then slowly combined with the milk to prevent lumps from forming. This creates a base that thickens beautifully when heated and maintains its structure when cooled.
The amount of cornstarch matters more than most people realize. Too little and your filling will be runny and impossible to slice cleanly. Too much and you’ll end up with a thick, gluey texture that’s more like pudding than pie filling. The sweet spot is usually around three tablespoons of cornstarch for a standard 9-inch pie, but this can vary depending on how much liquid you’re using. The mixture should coat the back of a spoon when it’s ready, and you should be able to draw a line through it with your finger that holds its shape for a few seconds.
Temperature control prevents cracked meringue
The biggest meringue mistake happens in the oven when people use too high heat trying to brown the peaks quickly. High heat causes the outside of the meringue to set and brown while the inside is still soft, creating tension that leads to cracks and tears. The proper technique involves starting with a moderate oven temperature around 350°F and baking just long enough for the peaks to turn golden brown. Some bakers prefer to use the broiler for the final few minutes, but this requires constant attention to prevent burning.
Even more important is letting the pie cool gradually rather than shocking it with cold air. Sudden temperature changes cause the meringue to contract and pull away from the filling or crust edges. The best approach is to turn off the oven and crack the door open slightly, allowing the pie to cool slowly for about 30 minutes before removing it completely. This prevents the dramatic shrinkage that can turn a beautiful pie into a cracked, weeping disaster. Room temperature cooling for another hour before refrigerating gives you the best chance of picture-perfect slices.
Serving and storage tips that actually work
Cutting chocolate meringue pie requires a different technique than regular pies because you’re dealing with delicate meringue that can collapse if handled roughly. A sharp knife dipped in warm water and wiped clean between each cut creates the cleanest slices. The warm blade glides through the meringue without dragging or tearing, while the clean blade prevents chocolate filling from building up and creating messy, uneven cuts. Some experienced bakers run the knife under hot tap water before each slice.
Storage presents its own challenges since meringue doesn’t love humidity or long refrigerator stays. The pie is best eaten within 24 hours of making, though it can last up to three days if stored properly. Cover it loosely with plastic wrap or aluminum foil, making sure the covering doesn’t touch the meringue surface. Never store chocolate meringue pie in an airtight container, as trapped moisture will make the meringue soggy and sticky. If you must make it ahead, consider making the chocolate filling and crust separately, then adding fresh meringue just before serving for the best texture and appearance.
Simple variations to customize the recipe
Traditional chocolate meringue pie is delicious on its own, but small changes can create exciting new versions without losing the classic appeal. A tablespoon of orange zest mixed into the chocolate filling creates a chocolate-orange combination that’s sophisticated and unexpected. Coffee lovers can add two tablespoons of strong espresso or instant coffee dissolved in a little hot water to intensify the chocolate and add depth. Vanilla extract is standard, but almond extract creates a more complex backdrop that makes the chocolate taste richer.
The meringue itself offers room for creativity without going overboard. A teaspoon of vanilla extract whipped into the meringue adds aromatic sweetness that complements the chocolate below. Some bakers fold in a tablespoon of cocoa powder to create chocolate meringue that echoes the filling, though this requires extra sugar to balance the bitterness. For special occasions, a few drops of food coloring can tint the meringue pale pink or yellow, creating a striking visual contrast against the dark chocolate filling. These small touches transform a forgotten classic into something that feels both nostalgic and fresh.
Common mistakes that ruin the whole pie
The most devastating mistake happens when people add the meringue to hot filling, which causes the bottom of the meringue to cook and become rubbery while the top stays fluffy. The chocolate filling needs to cool for at least 15 minutes after cooking but shouldn’t be completely cold, or the meringue won’t adhere properly. Another common error is under-whipping the meringue – it should hold stiff peaks that don’t droop when you lift the beaters. Soft peaks will collapse during baking and create a flat, sad-looking pie.
Rushing the cooling process destroys more pies than any other single factor. People get excited to taste their creation and either cut into it while it’s still warm, creating a messy, runny slice, or stick it straight into the refrigerator, causing the meringue to weep from condensation. The filling needs time to set properly at room temperature before chilling, and the meringue needs gradual cooling to maintain its structure. Patience during these final steps makes the difference between a professional-looking dessert and a disappointing mess that tastes good but looks terrible.
Chocolate meringue pie deserves a comeback in modern kitchens because it offers something store-bought desserts simply can’t match. The combination of rich chocolate custard and light meringue creates a perfect balance that’s both indulgent and refreshing, while the homemade touches show care that guests always notice and appreciate. This forgotten Southern classic proves that some recipes disappear not because they’re difficult, but because people stop taking time to make something truly special.
Classic Southern Chocolate Meringue Pie
Course: DessertCuisine: American8
servings45
minutes35
minutes385
kcalRich chocolate custard filling topped with golden meringue peaks creates the perfect balance of indulgent and airy in this forgotten Southern classic.
Ingredients
1 pre-baked 9-inch pie crust
3/4 cup granulated sugar
3 tablespoons cornstarch
1/3 cup unsweetened cocoa powder
2 cups whole milk
3 large egg yolks
3 ounces dark chocolate, chopped
3 tablespoons butter
2 teaspoons vanilla extract
3 large egg whites, room temperature
1/4 teaspoon cream of tartar
6 tablespoons granulated sugar for meringue
Directions
- Preheat oven to 350°F. In a heavy saucepan, whisk together sugar, cornstarch, and cocoa powder until no lumps remain. This dry mixture prevents the cornstarch from forming clumps when you add the liquid ingredients.
- Gradually whisk in milk until smooth, then cook over medium heat, stirring constantly until mixture thickens and boils. Continue cooking for 2 minutes while stirring to ensure the cornstarch is fully activated and the mixture coats the back of a spoon.
- In a small bowl, lightly beat egg yolks. Slowly whisk about 1/2 cup of the hot chocolate mixture into the yolks to temper them, then gradually whisk the warmed yolk mixture back into the saucepan. Cook for 2 more minutes, stirring constantly.
- Remove from heat and immediately stir in chopped chocolate, butter, and vanilla until chocolate is completely melted and mixture is smooth. Pour into the pre-baked pie crust and let cool for 15 minutes while you prepare the meringue.
- In a clean bowl with clean beaters, whip egg whites with cream of tartar until soft peaks form. Gradually add the 6 tablespoons of sugar, one tablespoon at a time, beating well after each addition until stiff, glossy peaks form.
- Spread meringue over the warm chocolate filling, making sure it touches the crust edges all around to seal completely. Use the back of a spoon to create peaks and swirls in the meringue for an attractive presentation.
- Bake for 12-15 minutes until meringue peaks are golden brown. Turn off oven and crack door open slightly, allowing pie to cool in oven for 30 minutes to prevent sudden temperature changes that cause cracking.
- Cool completely at room temperature for 1 hour before refrigerating for at least 3 hours. Cut with a sharp knife dipped in warm water and wiped clean between slices for the neatest presentation.
Notes
- Egg whites whip best at room temperature, so take them out of the refrigerator 30 minutes before making meringue
- The chocolate filling should be warm but not hot when you add the meringue to prevent the bottom from cooking
- Store covered loosely in refrigerator for up to 3 days, but the pie is best eaten within 24 hours for optimal meringue texture
Frequently asked questions about chocolate meringue pie
Q: Why does my meringue weep or get watery on the bottom?
A: Meringue weeps when it’s added to filling that’s too hot, when the egg whites aren’t whipped to stiff peaks, or when the pie cools too quickly. Make sure your chocolate filling has cooled for 15 minutes but is still slightly warm, whip the meringue until it holds stiff peaks, and cool the pie gradually in a cracked oven.
Q: Can I make this pie ahead of time?
A: You can make the chocolate filling and baked crust up to 2 days ahead, but the meringue is best added on the day you plan to serve it. If you must make the complete pie ahead, it will keep for up to 3 days in the refrigerator, though the meringue texture won’t be as perfect as when fresh.
Q: What’s the difference between chocolate meringue pie and chocolate cream pie?
A: Chocolate meringue pie uses a cooked chocolate custard filling made with cocoa powder, cornstarch, and eggs, topped with baked meringue. Chocolate cream pie typically has a chocolate pudding or ganache filling topped with whipped cream and is not baked after assembly.
Q: Why did my meringue crack or pull away from the edges?
A: Cracking and shrinking happen when the meringue experiences sudden temperature changes or when it doesn’t properly seal to the crust edges. Always spread meringue to touch the crust completely around the edges and cool the pie gradually rather than moving it from hot oven to cold refrigerator.