Craving that perfect crunch of a golden-brown chicken tender? You know the kind – crispy enough to make your teeth sing, yet juicy enough inside to make your taste buds dance. Well, get ready to elevate your chicken tender game, because we’re about to dive into the world of irresistibly crispy chicken tenders that’ll make your local diner green with envy.
The Buttermilk Bath That Changes Everything
Let’s start at the beginning, shall we? The journey to crispy chicken perfection begins with a luxurious buttermilk bath. This isn’t just any old soak – it’s like sending your chicken tenders to a spa retreat. The buttermilk works its magic by tenderizing the meat and infusing it with flavor. But here’s the kicker: add a pinch of salt to that buttermilk, and you’ve just created a flavor-enhancing brine that’ll make your taste buds stand up and salute.
Don’t have buttermilk on hand? No worries! Mix some plain yogurt with a splash of milk, and you’ve got yourself a tangy substitute that’ll do the trick. Let your chicken lounge in this creamy concoction for about 30 minutes. It’s like a power nap for your poultry – short but oh-so-effective.
The Breading Bonanza That’ll Blow Your Mind
Now, let’s talk about that crispy coating that’ll make your chicken tenders the talk of the town. Forget about plain old flour – we’re going for a breading bonanza that’s going to make your taste buds do a happy dance. Start with a base of all-purpose flour, but here’s where it gets interesting: add some cornmeal for extra crunch, a dash of smoked paprika for a subtle smoky flavor, and a sprinkle of garlic and onion powder because, well, who doesn’t love garlic and onion?
But wait, there’s more! The secret weapon in our crispy arsenal? Potato starch and cornstarch. These unassuming powders are the dynamic duo that’ll take your chicken tenders from “meh” to “magnificent.” They create a coating that’s lighter than air but crunchier than a fall leaf. And let’s not forget a pinch of baking powder – it’s like giving your breading a tiny pair of wings to puff up and create those irresistible craggy bits.
The Double Dredge That’ll Double Your Pleasure
Now, here’s where we separate the amateurs from the pros. We’re not just dredging once – oh no, we’re going for the double dredge. Start by giving your chicken a flour bath, then dip it in a mixture of eggs and cold water. This wet batter is like the glue that’s going to make all that flavorful breading stick like it’s trying to win a cuddling contest.
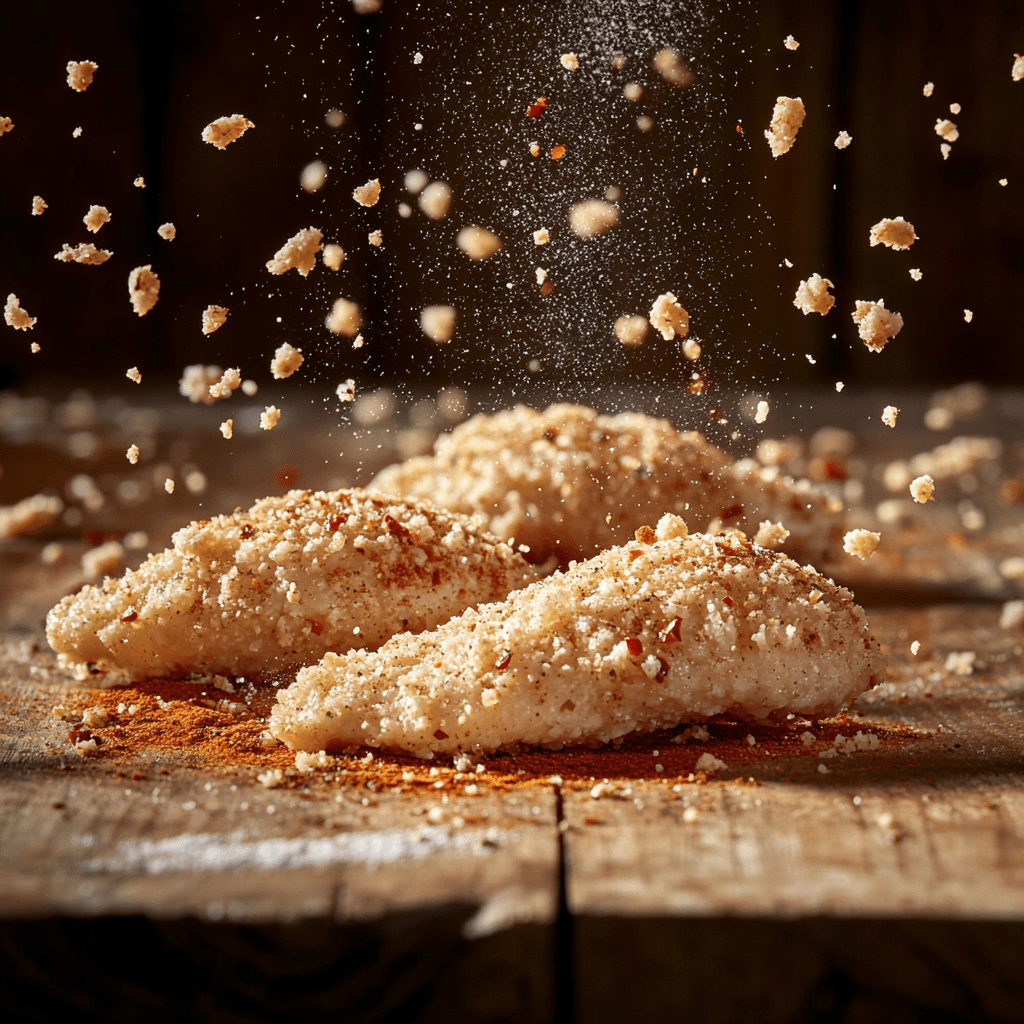
After the wet dip, it’s time for the grand finale. Press that chicken into your seasoned dredge like you’re trying to leave fingerprints. Get every nook and cranny coated. Then, here’s the pro tip: let those breaded tenders rest for a few minutes. It’s like letting the flavors get to know each other before the big fry – trust me, it’s worth the wait.
The Double Fry That’ll Make You Cry (Tears of Joy)
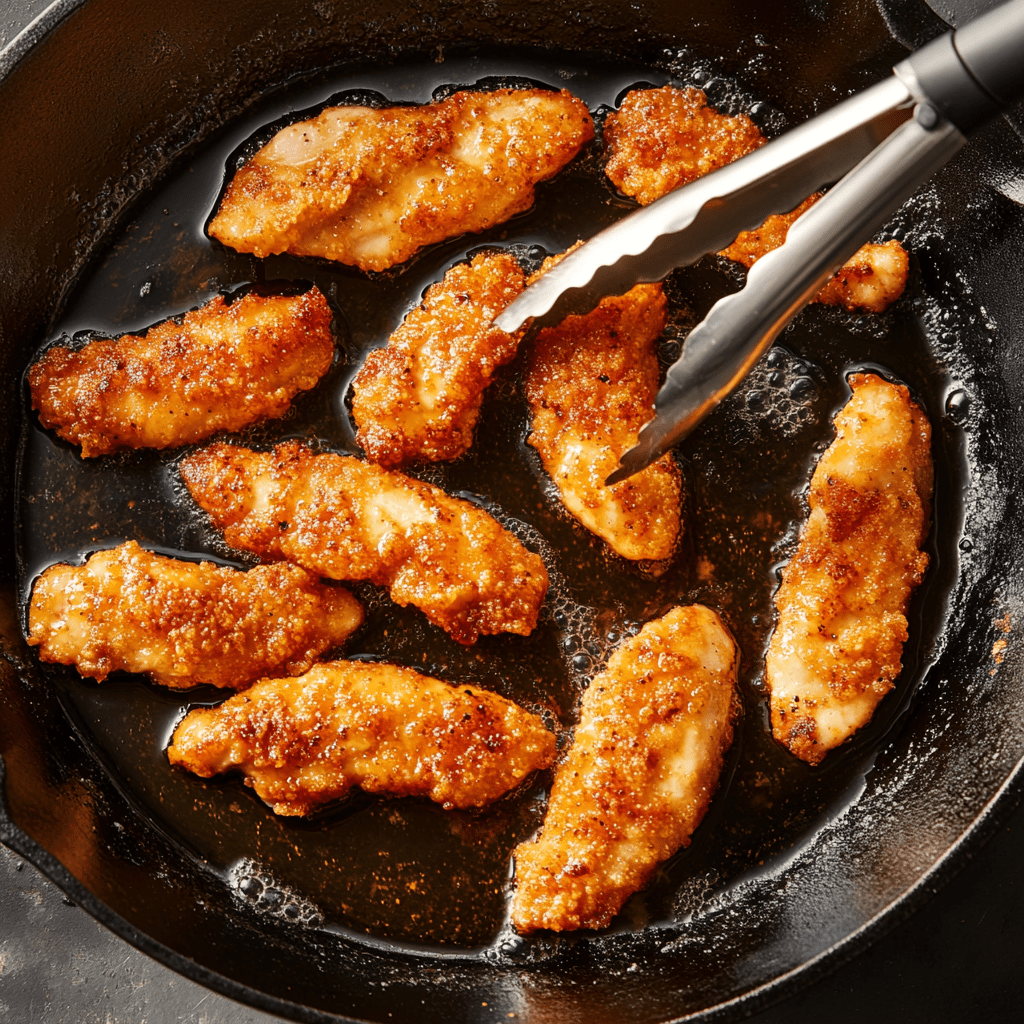
Alright, drumroll please… it’s time for the pièce de résistance – the double fry. This isn’t just frying; it’s an art form. Start with your oil at a cozy 325°F. Gently lower your chicken tenders into the oil like they’re VIPs entering a hot tub. Let them swim for about 4 minutes, then fish them out and let them rest on a wire rack. They might look a bit pale, but don’t worry – we’re not done yet.
Now, crank up the heat to 375°F. This is where the magic happens. Drop those par-cooked tenders back into the oil for a quick 2-minute sizzle. Watch in awe as they transform into golden-brown masterpieces of crunchiness. The first fry cooks the chicken through, while the second fry creates that earth-shatteringly crispy exterior that’ll have you wondering if you’ve died and gone to chicken tender heaven.
The Tools That’ll Take You to Tender Town
Now, let’s talk tools. A good chef is only as good as their equipment, right? First up, you’ll want a sturdy cast-iron skillet. This isn’t just any pan; it’s like the Superman of the kitchen – it can take the heat and distribute it evenly, ensuring your chicken gets that perfect golden glow all over.
Next on the list is an infrared thermometer. Think of it as your oil’s personal bodyguard, keeping a watchful eye on the temperature to make sure it stays just right. No more guessing games or sacrificial chicken pieces – this gadget will help you nail the perfect fry every time.
The Saucy Sidekicks That’ll Make You Swoon

What’s a crispy chicken tender without a killer dipping sauce? It’s like peanut butter without jelly, cookies without milk, or a joke without a punchline – it just doesn’t feel complete. Whip up a quick honey mustard by mixing equal parts honey, Dijon mustard, and mayonnaise. It’s sweet, it’s tangy, and it’ll make your taste buds do the cha-cha.
But why stop there? Let’s go on a sauce adventure! Stir together some ranch seasoning with sour cream and a splash of buttermilk for a cool and creamy ranch. Or, if you’re feeling saucy (pun intended), mix some BBQ sauce with a dollop of apricot preserves for a sweet and smoky sensation that’ll have you licking your fingers clean.
There you have it, folks – the secret to chicken tenders so crispy, they should come with a warning label. With this double-fry technique and our flavor-packed breading, you’ll be serving up restaurant-quality tenders that’ll make your family and friends wonder if you’ve been secretly moonlighting as a chef. So fire up that skillet, get your dredging station ready, and prepare for a crispy chicken adventure that’ll rock your world. Just don’t blame me when everyone starts showing up at your door for dinner!

Irresistibly Crispy Chicken Tenders
Course: Main CourseCuisine: American4
servings30
minutes40
minutes300
kcalDiscover the secret to making restaurant-quality, extra crispy chicken tenders at home with our game-changing double-fry technique!
Ingredients
1 pound chicken tenders
1 cup buttermilk
1 tablespoon salt
2 cups all-purpose flour
1/4 cup cornmeal
1/4 cup potato starch
1/4 cup cornstarch
1 tablespoon smoked paprika
1 tablespoon garlic powder
1 tablespoon onion powder
1 teaspoon baking powder
2 large eggs
1/4 cup cold water
Vegetable oil for frying
Directions
- In a large bowl, combine the buttermilk and 1 teaspoon of salt. Add the chicken tenders, ensuring they are fully submerged. Cover and refrigerate for 30 minutes to marinate and tenderize the chicken.
- In a shallow dish, mix together the flour, cornmeal, potato starch, cornstarch, remaining salt, smoked paprika, garlic powder, onion powder, and baking powder. This will be your seasoned dredge. In another shallow dish, whisk together the eggs and cold water to create your wet batter.
- Remove the chicken tenders from the buttermilk marinade and pat them dry with paper towels. Dredge each tender in the seasoned flour mixture, then dip it in the wet batter, and finally coat it again in the seasoned flour. Press the coating firmly onto the chicken to create a craggy texture. Set the coated tenders on a wire rack and let them rest for 5 minutes to help the coating adhere.
- Pour about 2 inches of vegetable oil into a large, heavy-bottomed pot or deep fryer. Heat the oil to 325°F (163°C), using a deep-fry thermometer to monitor the temperature. Carefully lower a few chicken tenders into the hot oil, being careful not to overcrowd the pot. Fry for 4 minutes, then remove and place on a wire rack set over a baking sheet.
- Once all tenders have gone through the first fry, increase the oil temperature to 375°F (190°C). Working in batches, fry the chicken tenders again for 2 minutes, or until they are golden brown and extremely crispy. Remove and drain on the wire rack.
- While the chicken is resting, prepare your favorite dipping sauces. For a quick honey mustard, mix equal parts honey, Dijon mustard, and mayonnaise in a small bowl. For a tangy BBQ sauce, combine your favorite BBQ sauce with a dollop of apricot preserves.
- Serve the crispy chicken tenders immediately with your prepared dipping sauces. Enjoy the perfect combination of a crunchy exterior and juicy interior!
Notes
- For best results, use an infrared thermometer to accurately monitor the oil temperature throughout the frying process.
- If you don’t have buttermilk, you can make a quick substitute by mixing 1 cup of milk with 1 tablespoon of lemon juice or white vinegar. Let it sit for 5 minutes before using.
- These chicken tenders are best enjoyed fresh, but if you have leftovers, reheat them in an air fryer or oven at 375°F (190°C) for 5-7 minutes to maintain their crispiness.
Frequently Asked Questions
Q: Can I make these chicken tenders ahead of time?
A: While these chicken tenders are best served fresh and hot, you can prepare them in advance. After the second fry, let them cool completely, then store in an airtight container in the refrigerator for up to 2 days. To reheat, place them on a wire rack in a preheated 375°F (190°C) oven for 10-15 minutes until they’re hot and crispy again.
Q: Is it necessary to do the double-fry method?
A: The double-fry method is key to achieving that extra crispy exterior while keeping the inside juicy. The first fry at a lower temperature cooks the chicken through, while the second fry at a higher temperature creates that irresistible crunch. While you can make decent chicken tenders with a single fry, the double-fry technique takes them to the next level of crispiness.
Q: Can I use this recipe for boneless chicken breasts instead of tenders?
A: Absolutely! If using boneless chicken breasts, slice them into 1-inch wide strips before marinating. The cooking process remains the same, but you may need to adjust the frying time slightly. Always ensure the internal temperature of the chicken reaches 165°F (74°C) for food safety.
Q: What’s the best oil to use for frying these chicken tenders?
A: For the best results, use a neutral-flavored oil with a high smoke point. Vegetable oil, canola oil, or peanut oil are all excellent choices for frying. Avoid oils with low smoke points like olive oil, as they can impart unwanted flavors and break down at high temperatures.