Who doesn’t love the classic delight of an ice cream cake? Particularly when it’s one that rivals the renowned Baskin-Robbins. In this article, I’ll share exclusive tips and tricks to create a homemade ice cream cake that not only matches but exceeds the charm of store-bought ones. We’ll delve into the art of selecting the perfect components, layering techniques, and decoration ideas to make your ice cream cake a showstopper at any gathering.
Choosing the Right Base: Brownies vs. Cake
One key to a superior ice cream cake lies in its base. While traditional cakes opt for sponge or cake layers, I recommend using brownies or blondies. Their higher fat and sugar content ensures they don’t fully freeze, maintaining a luscious texture even when cold. Imagine biting into a soft, chewy brownie layer complemented by creamy ice cream – pure bliss!
Tip: For an extra touch of indulgence, add a layer of fudge or caramel between the brownie and ice cream layers.
Check out this premium brownie mix for a quick and delicious base.
Layering Like a Pro
Layering is where you can get creative. Start with softened ice cream – real dairy for a luxurious taste. Spread it evenly over your brownie base, pressing out any air pockets. For added extravagance, intersperse layers with hot fudge, caramel, or even crumbled Oreos.
Tip: Let your ice cream sit at room temperature for a few minutes for easier spreading.
For an exceptional layering experience, consider using a cake leveler to ensure even layers.
The Art of Swirling: Adding Sauces and Fruits
Swirling in sauces and fruits adds both flavor and visual appeal. Opt for thicker sauces like homemade fudge, caramel, or maple syrup. If you’re adventurous, try well-cooked jam thinned with lemon juice. For fruits, use sugared fruit sauces or small pieces of fresh fruit to avoid hard, icy bits.
Tip: When adding swirls, place them on top of the ice cream layers without stirring, to maintain beautiful striations.
Frosting and Decoration: The Final Flourish
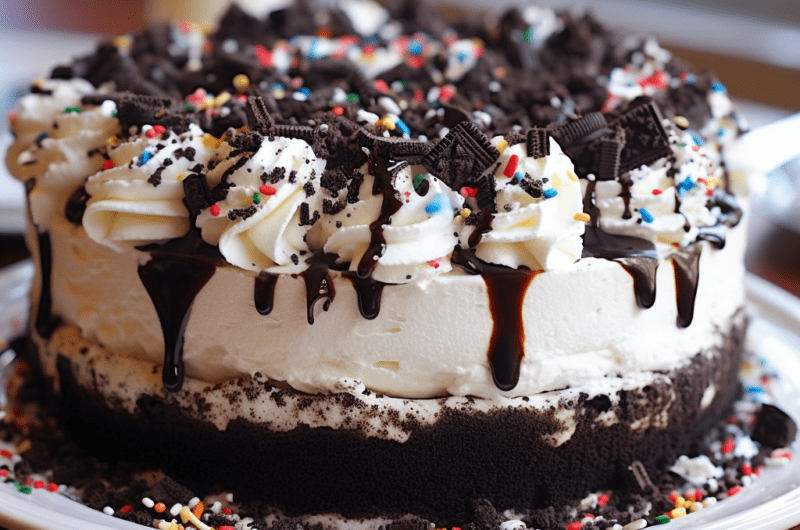
Your ice cream cake isn’t complete without a stunning frosting. Stabilized whipped cream is a fantastic choice – it’s light, creamy, and holds up well. For a dramatic finish, decorate with sprinkles, edible glitter, or even a drizzle of Magic Shell for a crunchy exterior.
Tip: A piping bag with star nozzles can add an elegant touch to your whipped cream decoration.
Browse these piping bag sets for impeccable cake decoration.
Storage and Serving: Keeping it Perfect
Proper storage is crucial. Freeze your cake for at least 4-6 hours before serving. To slice, use a knife dipped in hot water for clean, neat cuts. Remember, a well-made ice cream cake can last up to 1-2 months in the freezer, but who can wait that long to indulge?
Tip: To prevent freezer burn, wrap your cake in plastic wrap and then in foil before storing.
Consider investing in a high-quality knife set for the perfect slice.
In conclusion, making an ice cream cake that surpasses Baskin-Robbins is all about choosing the right base, mastering the art of layering, adding creative swirls, and finishing with a flourish of decoration and proper storage. By following these tips, your homemade creation will not only be a visual treat but also a delectable masterpiece that leaves your guests in awe. Remember, the beauty of homemade is in the personal touch – each cake is unique and a reflection of your culinary creativity. So, go ahead, and let your ice cream cake adventure begin!
Ultimate Homemade Ice Cream Cake
Course: DessertCuisine: American12
servings1
hour8
hours20
minutes12
hoursIndulge in the magic of making your own ice cream cake that surpasses any store-bought version, including the famed Baskin-Robbins.
Ingredients
1 quart of quality vanilla ice cream
1 quart of rich chocolate ice cream
1 batch of fudgy brownies, baked and cooled
1/2 cup of hot fudge sauce
1 cup of crushed Oreo cookies
2 cups of stabilized whipped cream
Sprinkles for decoration
Directions
- Line a 9-inch cake pan with plastic wrap. Soften the vanilla ice cream by leaving it at room temperature for a few minutes. Spread it evenly in the pan, smoothing out the top. Freeze for about 1 hour or until firm.
- Place the cooled brownie layer as the base in a springform pan. Spread the hot fudge sauce over the brownie layer, then sprinkle the crushed Oreo cookies on top, pressing them gently into the sauce.
- Remove the vanilla ice cream layer from the freezer. Carefully lift it out of the pan using the plastic wrap and place it on top of the brownie layer. Press down gently to secure it.
- Soften the chocolate ice cream and spread it evenly over the vanilla layer. Ensure there are no air pockets and the surface is smooth. Return the cake to the freezer and freeze until the chocolate layer is firm, about 1 hour.
- Once the chocolate layer is firm, remove the cake from the freezer. Unmold it from the springform pan and transfer it to a serving plate. Frost the cake with stabilized whipped cream, ensuring to cover the sides and top evenly.
- Decorate the top of the cake with sprinkles or additional cookie crumbs. Return the cake to the freezer for at least 2 hours or until ready to serve.
- Before serving, let the cake sit at room temperature for about 10-15 minutes to soften slightly. Use a knife dipped in hot water for clean cuts. Serve and enjoy your homemade masterpiece!
Notes
- Use quality ice cream for better flavor and texture.
- You can replace the brownie layer with a blondie or your favorite cake layer.
- Stabilized whipped cream holds up better for frosting ice cream cakes.
Frequently Asked Questions
Q: How can I prevent the layers from melting while assembling the cake?
A: Work quickly and ensure each ice cream layer is fully frozen before adding the next. You can also freeze the brownie or cake layer before assembly to keep everything cold.
Q: Can I make this cake with different ice cream flavors?
A: Absolutely! Feel free to experiment with your favorite ice cream flavors. Just ensure they complement each other and the brownie base.
Q: How long can I store the ice cream cake in the freezer?
A: Properly wrapped, your ice cream cake can be stored in the freezer for up to 1-2 months. However, for the best texture and flavor, it’s best consumed within a week.
Q: What’s the best way to serve the ice cream cake to avoid messy slices?
A: Let the cake sit at room temperature for 10-15 minutes before slicing. Use a sharp knife dipped in hot water to cut clean, even slices.