Chicken breasts have a reputation for being dry and boring, but that’s only because most people cook them wrong. The secret to tender, juicy chicken isn’t fancy equipment or complicated techniques. It’s actually about what happens after the heat turns off. This simple stovetop method takes about twenty minutes total and works every single time without fail.
Why chicken breasts turn out dry and tough
Boneless, skinless chicken breasts are incredibly lean meat with almost no fat to keep them moist during cooking. When you cook them over direct heat the entire time, the outside overcooks before the inside reaches a safe temperature. Even one extra minute can turn perfectly cooked chicken into something that feels like chewing on a rubber band. The temperature needs to hit 165°F to be safe, but getting there without drying out the meat feels impossible.
Most home cooks either undercook chicken because they’re scared of drying it out, or they overcook it trying to make sure it’s safe to eat. The constant flipping and checking makes things worse because you’re letting all the heat and moisture escape from the pan. This cooking method fixes that problem by using residual heat and trapped steam to finish cooking the chicken gently from the inside out.
The covered pan trick that changes everything
The key to this method is covering the pan with a tight-fitting lid after just one minute of cooking on each side. After you flip the chicken and reduce the heat to low, you cover the pan and walk away for ten minutes without peeking. Then you turn off the heat completely and let the chicken sit covered for another ten minutes. The trapped steam and residual heat gently finish cooking the chicken without drying it out.
This technique requires some trust because your instinct will be to lift the lid and check if the chicken is done. But every time you peek, you’re releasing the steam that’s doing the actual cooking. The method works because the gentle, even heat cooks the chicken through without toughening up the proteins. After the full twenty minutes, the chicken will be perfectly cooked to 165°F and incredibly juicy.
Starting with the right size chicken matters
This method works best with chicken breasts that weigh around eight ounces each. If your chicken breasts are much larger than that, the timing won’t work the same way and you might end up with undercooked chicken. Many grocery store chicken breasts are huge nowadays, sometimes weighing twelve ounces or more. You can cut these larger breasts in half horizontally to create two thinner pieces that will cook properly.
Another important step is pounding the chicken to an even thickness before cooking. Chicken breasts are naturally thicker at one end and thinner at the other, which means they cook unevenly. Use the bottom of a heavy jar, a small pan, or a meat mallet to gently pound the thicker end until the whole breast is about the same thickness. This ensures that every part of the chicken finishes cooking at the same time.
The simple seasoning approach that works best
For this basic method, all you need is kosher salt and black pepper on both sides of the chicken. The simplicity makes this chicken perfect for using in other dishes like salads, sandwiches, pasta, or chicken salad where you’ll add other seasonings later. Pat the chicken completely dry with paper towels before seasoning because any surface moisture will prevent the chicken from getting that light golden color on the first side.
That said, you can absolutely use any seasoning blend you want. Cajun seasoning, Italian herbs, garlic powder, onion powder, or any spice rub will work great with this cooking method. Just rub the seasonings all over both sides of the chicken before you start cooking. The technique stays exactly the same regardless of what seasonings you use. Some people even dredge the chicken in seasoned flour before cooking for a subtle crispy coating.
Getting the pan and temperature right
Use a large skillet or sauté pan that can fit all your chicken breasts in a single layer without them touching each other. The pan needs a tight-fitting lid without any steam vents or holes, which is crucial for this method to work. Cast iron, stainless steel, and nonstick pans all work fine as long as they have a proper lid. Heat the empty pan over medium-high heat first, then add about one tablespoon of olive oil or butter.
Once you add the oil, swirl it around to coat the bottom of the pan, then immediately reduce the heat to medium before adding the chicken. This prevents the oil from smoking and the chicken from burning. After you place the chicken in the pan, let it cook for exactly one minute without moving it. This creates a light golden color on that first side and helps seal in moisture.
The exact timing that produces perfect results
After the first minute, flip each chicken breast over and immediately reduce the heat to low. Cover the pan with your tight-fitting lid and set a timer for exactly ten minutes. Do not lift the lid during this time, no matter how tempting it is to check. The steam trapped inside the pan is what cooks the chicken gently and evenly without drying it out.
When the timer goes off after ten minutes, turn off the heat completely. If you have an electric stove, move the pan off the hot burner entirely. Keep the lid on and set another timer for ten more minutes. Again, resist the urge to peek inside. After this second ten-minute rest, you can finally remove the lid. The chicken will be cooked through to a safe temperature and incredibly moist throughout.
Checking if the chicken is actually done
After the full twenty minutes of cooking and resting, your chicken should be perfectly done. If you’re still nervous about it, use an instant-read thermometer to check that the thickest part of the chicken has reached 165°F. Insert the thermometer into the side of the chicken breast and push it into the center. The temperature should read at least 165°F, though it might be a few degrees higher.
If your chicken isn’t quite done yet, it’s likely because the breasts were larger than eight ounces or the heat was too low on your stove. Just put the lid back on and let the chicken sit for another few minutes with the residual heat. For future batches, you can adjust by cooking for an extra minute or two during the covered cooking phase. Once you make this a few times, you’ll know exactly how it works with your specific stove and pans.
What to do with perfectly cooked chicken
This chicken is perfect for meal prep because it stays moist even after refrigerating. Slice it up and keep it in the fridge for up to four days to throw on salads, stuff into sandwiches, or add to grain bowls throughout the week. The simple seasoning means it works with any cuisine or dish you’re making. You can also freeze cooked chicken for up to two months.
Some of the best ways to use this chicken include chicken Caesar salad, pasta with chicken and vegetables, chicken quesadillas, chicken salad sandwiches, and rice bowls. You can also serve the chicken breasts whole with your favorite sides like roasted vegetables, mashed potatoes, or rice pilaf. Top the chicken with any sauce you like, from marinara to pesto to gravy. The possibilities are endless when you start with perfectly cooked, juicy chicken.
Adjusting the method for different situations
If you want to cook more than two chicken breasts at once, just make sure your pan is large enough that they don’t touch each other. The timing stays exactly the same whether you’re cooking two breasts or four. For boneless, skinless chicken thighs, this same method works great but you need to add five extra minutes to both the cooking time and the resting time for a total of thirty minutes.
Some people add a cup of water or chicken stock to the pan right before covering it for the ten-minute cooking phase. This creates even more steam and can help if your lid doesn’t fit perfectly tight. The liquid also gives you a flavorful base for making a quick pan sauce afterward if you want to get fancy. Either way works fine, though the chicken will be plenty moist without adding any liquid.
Once you master this technique, cooking chicken breasts becomes completely stress-free. No more cutting into chicken to check if it’s done and losing all those juices. No more dried-out, overcooked chicken that everyone has to drown in sauce just to choke down. Just perfectly cooked, tender, juicy chicken breasts every single time that you can use in countless different meals throughout the week.
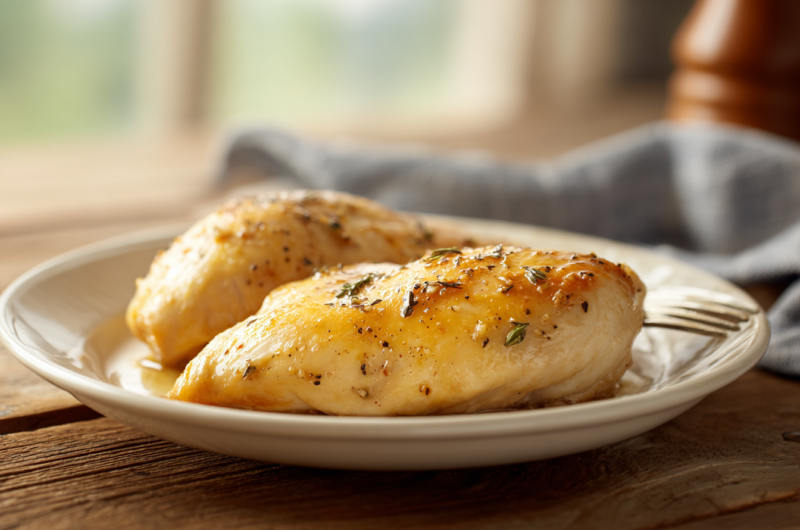
Perfect Stovetop Chicken Breasts
Course: DinnerCuisine: American Recipes2
servings5
minutes20
minutes230
kcalThis foolproof method produces incredibly juicy and tender chicken breasts using just a covered skillet and twenty minutes of mostly hands-off time.
Ingredients
2 boneless, skinless chicken breasts (about 8 ounces each)
1 teaspoon kosher salt
1/2 teaspoon black pepper
1 tablespoon olive oil or butter
Directions
- Pat the chicken breasts completely dry with paper towels. If one end of the breast is significantly thicker than the other, use the bottom of a heavy jar or small pan to gently pound it to an even thickness throughout. This ensures the chicken cooks evenly.
- Season both sides of each chicken breast generously with kosher salt and black pepper. You can also use any seasoning blend you prefer, such as Cajun seasoning, Italian herbs, or garlic powder. Make sure to rub the seasonings all over the surface of the chicken.
- Heat a large skillet with a tight-fitting lid over medium-high heat. Add the olive oil or butter and swirl to coat the bottom of the pan. Immediately reduce the heat to medium before adding the chicken to prevent the oil from smoking.
- Place the chicken breasts in the pan in a single layer without touching each other. Set a timer for exactly 1 minute and do not move or touch the chicken during this time. This allows a light golden color to develop on the first side.
- After 1 minute, flip each chicken breast over using tongs. Immediately reduce the heat to low and cover the pan with the tight-fitting lid. Set a timer for 10 minutes and walk away without lifting the lid during this time.
- When the 10 minutes are up, turn off the heat completely. If using an electric stove, remove the pan from the hot burner entirely. Keep the lid on and set another timer for 10 minutes. Do not peek or lift the lid during this resting time as the trapped steam continues to gently cook the chicken.
- After the second 10-minute period, remove the lid. The chicken should be perfectly cooked through and very juicy. If you want to verify, use an instant-read thermometer inserted into the thickest part of the chicken to check that it has reached at least 165°F.
- Let the chicken rest on a cutting board for 2-3 minutes before slicing. This allows the juices to redistribute throughout the meat. Slice and serve immediately, or store in an airtight container in the refrigerator for up to 4 days.
Notes
- The chicken breasts should be no larger than 8 ounces each for this timing to work properly. If your breasts are larger, cut them in half horizontally to create thinner pieces.
- The lid must fit tightly without any steam vents or holes for this method to work. The trapped steam is what gently finishes cooking the chicken.
- For boneless, skinless chicken thighs, add 5 extra minutes to both the covered cooking time and the resting time for a total of 30 minutes.
- You can add 1 cup of water or chicken stock to the pan right before covering if you want extra steam and a base for making a pan sauce.
- Cooked chicken can be frozen in an airtight container for up to 2 months. Thaw in the refrigerator before using.
Frequently asked questions
Q: Can I use this method with frozen chicken breasts?
A: No, you need to completely thaw the chicken breasts first. Frozen or partially frozen chicken won’t cook evenly with this method and could end up undercooked in the center. Thaw chicken breasts in the refrigerator overnight or use the defrost setting on your microwave before cooking.
Q: What if my chicken breasts are different sizes?
A: Try to use chicken breasts that are similar in size and weight so they cook evenly. If you have one that’s significantly larger, you can cut it in half horizontally to create two thinner pieces, or save it for another meal. Cooking breasts of very different sizes together means some will be overcooked while others are undercooked.
Q: Do I need to flip the chicken more than once?
A: No, you only flip the chicken one time after the first minute of cooking. Flipping it multiple times or moving it around in the pan releases the steam and heat that’s cooking the chicken gently. The whole point of this method is to leave it alone and let the covered pan do the work.
Q: Can I cook more than two chicken breasts at once?
A: Yes, as long as your pan is large enough that the chicken breasts can lay flat in a single layer without touching each other. The cooking time stays the same whether you’re making two breasts or four. Just make sure your lid still fits tightly over the larger pan.